Saturday, 11 April 2015

11 Songs

Hey Guys!

I hope your Easter was good and the rest of your week was awesome!

For this week's post, I'm doing a list of 13 of my favourite songs. They may be your kind of style, or not, or they may influence you to try out a new artist! I change the songs I love a lot of the time and change my mind about artists almost every day but there are a few songs that I can't seem to shake! 

There is no way I'm going to be able to write more than a sentence for each song though! I just have no words to describe how much I love them!

1. Don't - Ed Sheeran 

This first song has been on my favourite list since I heard it for the first time. It's just so catchy and just cool!

2. Lay Me Down - Sam Smith ft. John Legend

This one is so beautiful, their voices blend so well and it is a really lovely song! 

3. Give Me Love - Ed Sheeran

This one is a relatively new find for me, even though it came out a while ago, but I have since added it to my playlist and haven't stopped listening to it!

4. Barton Hollow - The Civil Wars 

I'm so sad that the Civil Wars broke up! Their voices are just so melancholy and go so well together. This one is my favourite one of their songs as it has a very quick beat and cool lyrics.

5. Tell Her About It - Billy Joel

My friend, for my birthday last year, made me a CD with lots of really upbeat songs on it and this one was in the mix. It's just so awesome and I love it!

6. Here's To Never Growing Up - Avril Lavigne 

This song is a bit of a random one actually because I love the tune (and the words) but I don't particularly like anything else that Avril Levigne has done, I just don't feel like I particularly connect with any of her songs, except this one!

7. I'm Yours - Jason Mraz

This one will always be one of my favourites, I love the music video for it and the words are just so beautiful. It's just all round nice-ness!


8. How To Save a Life - The Fray 

I'm not too sure why this song made it onto my list, because it brings me pretty close to tears every time I hear it. I can't put my finger on what it is about this song but hopefully someone else will notice and let me know!

9. Blame It On Me - George Ezra 

This one is such a catchy song and I can't help but sing along when it comes on... which is bad because sometimes it can be in public places... but I sing anyway!

10.  Shake It Off - Taylor Swift 

Not everybody likes Taylor Swift but she will forever be one of my favourites, I just think she writes some really cool songs! This one being one of them! Ever since I saw my cousin dancing and singing to this song at Christmas, I can't help but smile when I hear it!

11.  All Of The Stars - Ed Sheeran 

This song is just awesome. It can't be described very easily! It's on the sound track for The Fault in our Stars film and I think I may have mentioned it before. *goes to check* It was in my review of TFIOS actually! I'm still loving it!

Wow! That was slightly harder than I thought it was going to be and there are so many words! I think I'm going to have to add lots of pictures to my posts for the next few weeks to balance it out! However, describing songs, I now know, is not my forte! I'll just stick to making things I think!

Next week's post is going to be a review as it's my last DofE weekend! The real thing *sharp intake of breath as I realise that it's quite soon* but I'm super excited for it!

A quick question first. Blogger shows me where my page views come from by country and in the past few days I've had a lot of views from Russia. I'm thrilled there's someone (or more than one person) who enjoys reading but I'm slightly confused about how you've suddenly found my blog! It would be great if you could let me know! I'm always glad to hear from people who read my posts! (but don't feel like you have to comment, you can always message me on one of my social media profiles).

Anyway, have a wonderful week guys! 

Until next time 
Grace
X

Sunday, 5 April 2015

Knitted Baby Bunnies

Hey guys!

I hope you've all had a lovely weekend! This post is a knitting pattern, as promised, and it can be Easter related but it can be just a regular knit. It is for these tiny little bunnies! I altered the original pattern so that it suited me and you can do the same, if needs be. 

These little bunnies are really cute and are only about an inch in length. You will need; some wool, in any colour you want; knitting needles; a tapestry needle to sew it up later; black/brown wool for the eyes and some stuffing, this can be excess wool or cotton wool etc. The needles you will need are US size 1 (2.25mm) UK size 13, but I think it would most likely work with a lot of different sizes, so long as the stitches are fairly tight so the stuffing doesn't show through when it is sewn up.

Abbreviations:
 st - stitches 
 kfb - knit front then back
 k1 - knit 1 stitch 
 bind off - cut the remaining wool (leaving a long-ish tail) and pass the end of the wool through the stitches on the needle and pull tight to bind it
 k2tog - knit 2 stitches together 

To knit front then back, you need to do a regular knit stitch but before you slip it off the needle, knit into the back of the stitch. This can be fiddly if your stitches are tight but if you practice then it gets easier to do. 


To knit two together, you need to do a regular knit stitch but instead of just going through one loop, you need to go underneath two instead.


This is the pattern, but feel free to change it in any way you like.

The body:

Cast on: 6 st
Row 1: [kfb] 6 times (to get 12 st)
Row 2:[kfb, k1] 6 times (to get 18 st)
Row 3: knit
Row 4: knit 
Row 5: knit 
Row 6: knit 
Row 7: knit 
Row 8: knit 
Row 9: [k2tog, k1] 6 times (to get 12 st)
Row 10: [k2tog] 6 times (to get 6 st)
Bind off

The ears:

Cast on: 2 st
Knit 10 rows 
Bind off 

To make up the rabbit, sew the long ear through the middle of the top of the head side of the rabbit (the end where you bound it off).  Each end should stick through, so that they look like little floppy ears. You can sew the ends in at this point. 


You then need to sew on some eyes, two little black lines below the ears, you can also sew a little pink nose on too. This will make the little face, you may have to practice a few times as every time I have tried, it has ended up looking slightly creepy! 

You also need to stitch on a little tail at this point, you just have to stitch it so it is vaguely in a circle but it doesn't really matter.


At this point, you need to insert some stuffing or the excess wool to pad it out and stitch up the bottom with the needle. The little bunny should be finished now.


I think these bunnies are really cute, the two that I have made both ended up different sizes, even though I did all the same things and used the same sized needles! 


Until next time
Grace
X

Friday, 3 April 2015

Easter nails

Hey guys!

Happy Good Friday (if you celebrate it!), and if you don't, Happy Friday! :)

This weekend, I'm going to do a post tonight and then another Sunday morning, as I'm out all day tomorrow and won't have any wi-fi to post, but I had 2 different things I wanted to post.

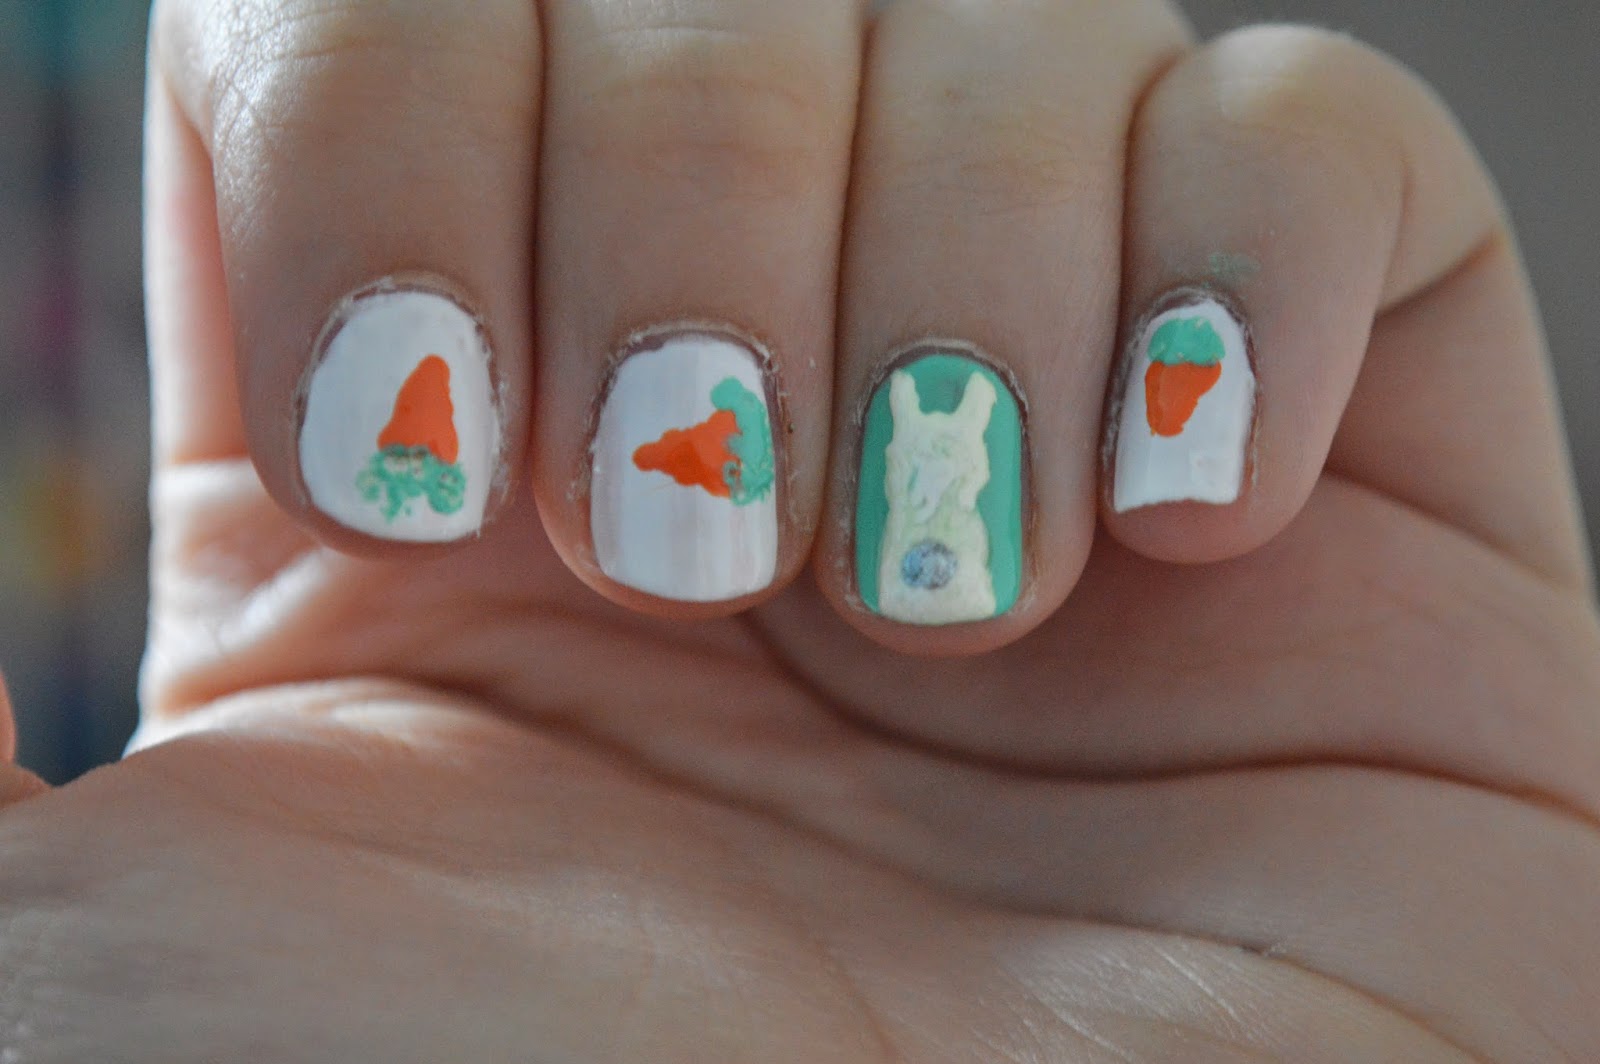
Today's post is an Easter nails idea. I'm not actually using these nails for my weekend but rather, I now have painted them nude with glitter on top, I'll Instagram a photo in a bit! The first one is supposed to be grass with flowers on it but, in hindsight, it kind of looks like vomit! (eww!) 

First, I painted a strip of green along the top edge of my nail and then, using my nail brush, I dragged the paint upwards to give the impression of grass along the bottom of the nail. This bit went well, and I think it looked ok, but then I added colour...


I added some different coloured spots and spread them out a little to create flowers. In my mind, this worked very well, but in reality, it looked dreadful! (or at least, I think it did. if you like vomit nails, then feel free to recreate it!)


The nails that I did (kind of) like, were these next ones. I painted one nail green and the other four white. Then, on the green nail, I painted the outline of a rabbit sitting down. This was a little difficult as the tool I was using was very difficult to use (I'd recommend using a toothpick if you're going to do this). Don't forget to add two floppy ears! I added a little silver tail to it too (because white wouldn't show up on white, haha) to add a little more detail. I think this little bunny is quite cute but the versions on Pinterest are so much neater than mine, but that always seems to happen! I think people on Pinterest must just have the magic touch!


On the four white nails, I painted a little carrot on each. As it was the first time I had painted a carrot before, I just did one bigger one but I think lots of smaller carrots would look much cuter, and more delicate.


I prefer the second lot of nails to the first, by far! I hope you like them too! Have a lovely weekend! And have a lovely Easter! Enjoy all your chocolate!


Until next time
Grace
X

Saturday, 28 March 2015

How to... Knit!

Hey guys! 

I hope you have had a good week! Mine has been very long and tiring but at least I've finished the term and it's the Easter holidays now.

This post is another how to, it's how to knit. I'm sure many of you are very experienced knitters but for those of you out there who want to start but have no idea how to; this is the post for you. I'm very sorry if you can't understand it or the pictures are a little blurry, I had no idea how to take them and there are some stages that are a little tricky to describe. I wanted to do this post because it means that I can show you a really cute pattern that I found this morning.

To start off, you will need a pair of knitting needles, some wool and some scissors for the end. Both the needles I used were the same size but one was a different colour so it is easier for you to see the difference.


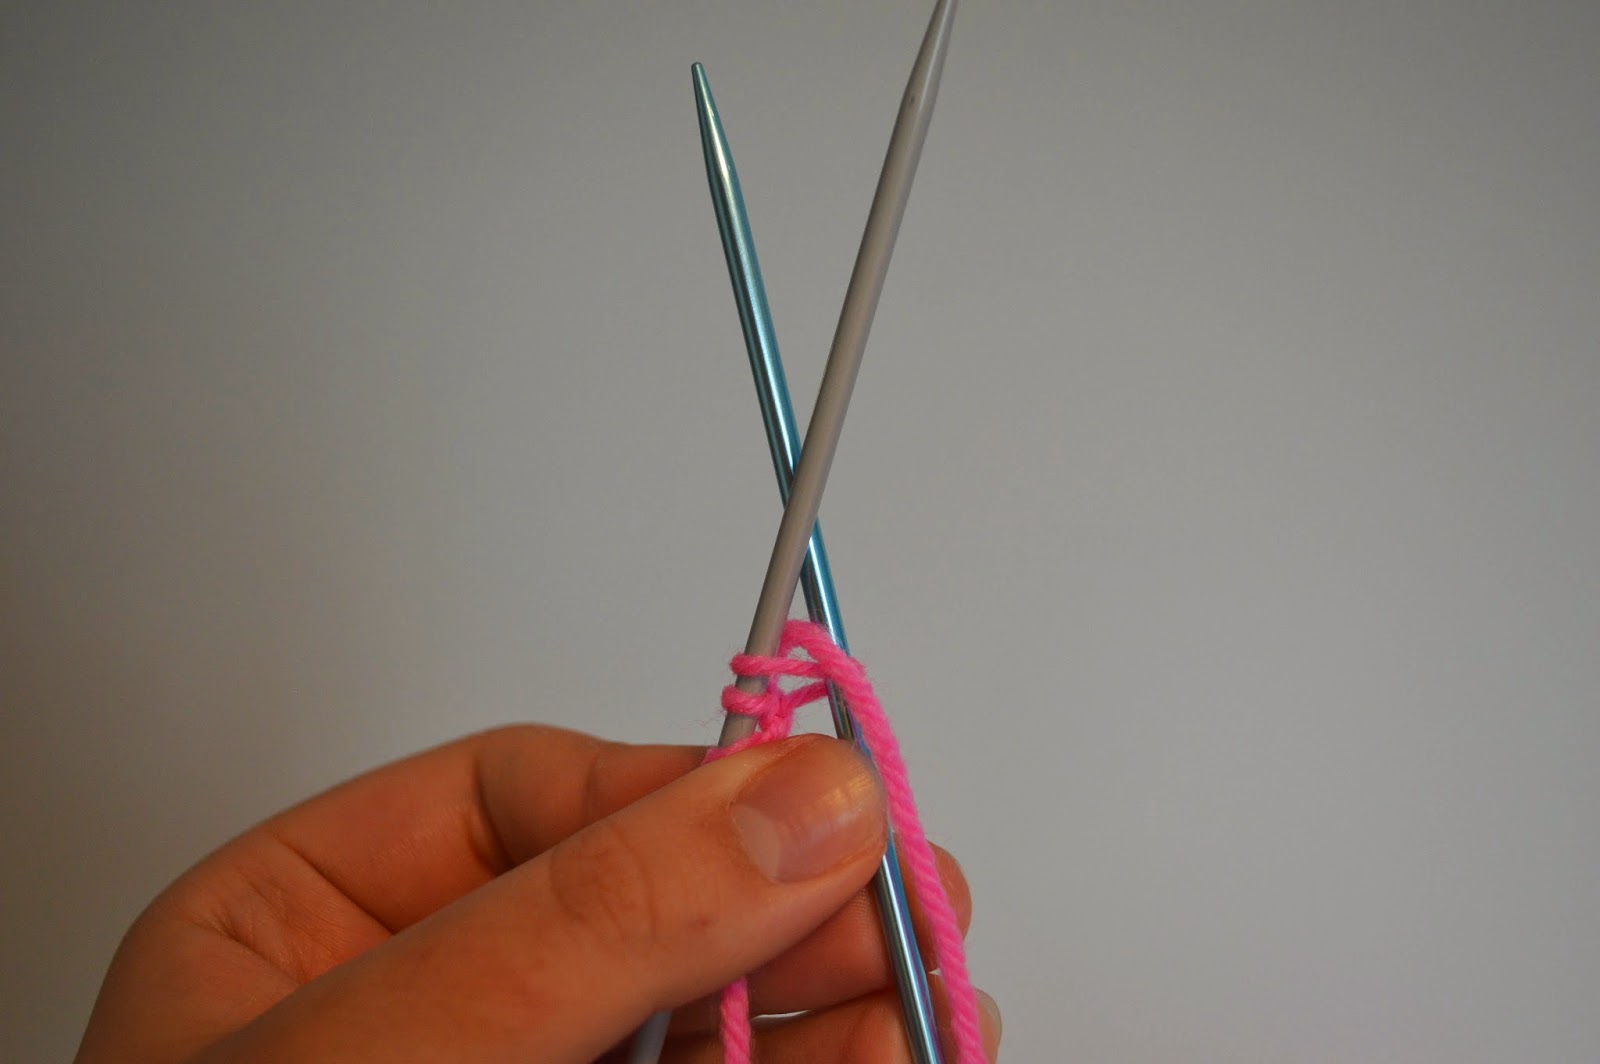
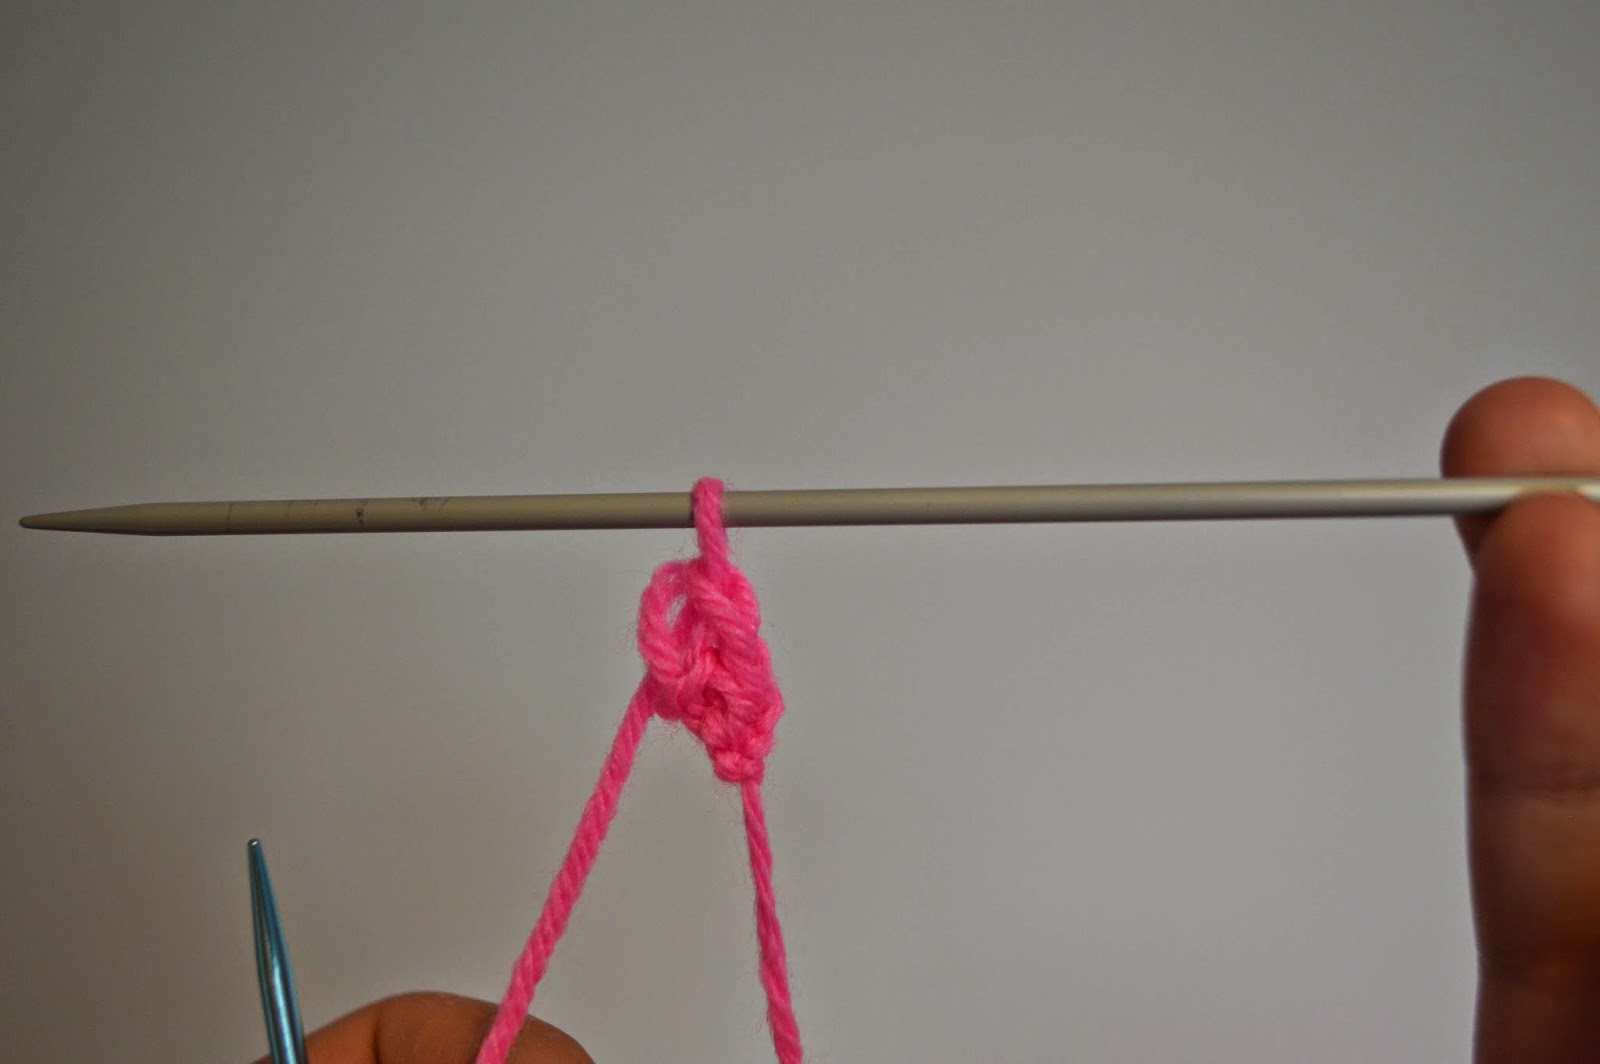
The first step is to cast on. Tie a loop knot but not pull it tight until it is on the needle, this is the first stitch.


You then need to push the 2nd needle through the stitch and wrap the wool anticlockwise around the 2nd needle. Then, twist the needle so that you can slip the 2nd stitch onto the needle. You can repeat this step as many times as you want to create as many stitches as you need. I find that when I cast on, it is easier to push the needle between 2 of the stitches on the needle and then cast on that way, but I'd recommend practicing the casting on several times. 


Next comes the actual knitting. Holding the needle with the stitches on it in your left hand, push the needle with no stitches on it through the loop of the stitch closest to the open end on the needle. Then, loop the wool through the gap (anti-clockwise). Push the end of the needle over the new bit of wool and through the loop and then pull the stitch off onto the old needle and onto the new one. This is just a plain knit stitch but there are plenty of other variations you can do. Repeat this until the end of the row and then swap the needle with the stitches on it into your left hand once again.


Once you have finished your piece of knitting (whether you are practicing or following a pattern); it is time to cast off. This can be done by knitting the first 2 stitches onto the new needle and then slipping the stitch closest to the closed end of the needle over the other and off the needle. Then, knit another stitch and repeat the slipping over of the furthest stitch.


When you are left with only one stitch left, cut the wool (with a few inches extra) and then thread it through the loop of the stitch. Pull it tight and your knitting is now cast off, you can then sew in the excess wool on the edges to neaten it up.


I hope this post is useful in some way! I tried to explain the best I could but explaining how to do things doesn't happen to be my strong point! However, now I get to post about the cute pattern I found!


I hope you have a lovely rest of the weekend, wherever you may be!


Until next time 
Grace
X

Monday, 23 March 2015

Banana and cinnamon muffins

Hey guys!

Sorry I couldn't post on Saturday like usual, it was my practice weekend for my Duke of Edinburgh award! We think we walked about 15 miles and now I ache quite a bit! However, it was so amazing and I loved every minute! Anyway,on to the post!

This one is going to be another short post, I really don't like writing short ones because I think they're more boring but since I have to be up early tomorrow, it's going to have to be. This one is another recipe, except, this time, you can eat it! Banana and cinnamon muffins! I really loved making this recipe, I used a standard (50g per egg) cake recipe but decided to add my own amounts of extras afterwards. 

You will need: a mixing bowl, a spoon to mix or an electric whisk, cake/muffin cases and a tray to put them in. Also, flour, eggs, butter, sugar, cinnamon and banana will be helpful too!

First up, mix 100g of butter and 100g of caster sugar together in a bowl until it is creamy. Then, I'd suggest whisking up the whites of 2 eggs (add the yolks to the butter and sugar mixture) so they're very light and fluffy. you can then add this gradually while sifting in 100g of self raising flour. This should (hopefully) make the mixture thicker and smooth.

At this point, you can add in about 1 teaspoon of ground cinnamon. The banana I added at first was quite small so I decided to add 2 in. I tried to mash them up as much as possible so that it wasn't lumpy, in the end it looked a little like puree which I think is a good thing. The banana will weigh down the cake when it is baked so I suggest adding about 2 teaspoons of baking powder, this will hopefully make it rise more. I didn't add it in when I made these and they were quite small and heavy. (At this point, you can add any other additions in).

I thought these muffins were so tasty and this mixture made about 12 large-ish cupcakes. I definitely think that different recipes are fun to make and it's great to try new things and see if they work! You never know, you may find a new favourite!

As it's almost Easter, I was thinking of doing a few festive posts soon, I've been searching on Pinterest for a few ideas and I was thinking of maybe doing some decorated egg shells but if you have any other ideas, feel free to tweet me! @_littleblog


Until next time 
Grace
X

Sunday, 15 March 2015

Salt Dough

Hey guys,

You'll be pleased to hear that I survived the training weekend! Woop! I still have 2 left but at least my group didn't get too lost when we were walking on our own!

This week's post is a recipe, but a slightly different recipe... you probably shouldn't eat this one! It's salt dough. This dough can be used to create little ornaments or coasters or a lot of other things. My use relates to Mother's Day, which was today! I made some little circles that I wrote quotes on for my mum to give to her as a present. For the measurements of this dough I didn't measure it at all since the recipe I found online was in cups. I'm pretty sure you don't need to be entirely accurate with the measurements; so long as it has a dough-like consistency and isn't too wet.

You will need; an old-ish bowl (I just used an old lunch box), a spoon, a cup, plain (all-purpose) flour (but you can use self-raising flour too), salt, water and anything you will need to make any shapes you want (like a rolling pin, cookie cutters or a sharp knife).


You need to mix together, in the bowl, 1 cup of water and 1 cup of salt. I did this first because it meant I could dissolve the salt before trying to thicken it up. You then need to mix in 2 cups of flour. This will thicken up the mix into a dough. You may have to add more (or less) flour depending on the consistency but make sure you have some left to put on the surface you are rolling it out on.


(It looked a bit gross at this point)


The best idea is to roll out the dough so that it isn't too thick, the thicker it is, the longer you will have to bake it for to harden it. You can then cut out any shapes you like but when you bake it, it is a good idea to put it on some grease-proof paper so that it doesn't stick to the baking tray. I put mine in the oven, on a low heat (about 90 degrees Celsius) for about an hour and a half but yours may take longer if they are thicker. Try not to bake them on too high of a temperature as they may burn, there also isn't really time amounts, it's all a matter of when the clay is completely solid that it is done (or at least that's what the recipe I found said).


After they were done, I painted them white with acrylic paint (but you could use any paints) and wrote quotes on them with felt tips. 


For example; this quote by Phil Dunphy from Modern Family! This one is definitely one of my favourites! That and, 'go through life like a duck, majestic on top but kicking like hell below the surface.


My mum really liked these quote stones! I made an effort to make each one different and as happy as possible! I hope you guys give this a go because you can truly make anything with it! There is also a lot of ideas you can find on Pinterest for it! And it makes a good, quick craft for children too! Especially on rainy days or in the school holidays.

Next week is my practice expedition for my DofE so my post may go up on Monday instead. Wish me luck...


Until next time
Grace

Friday, 6 March 2015

The DofE

Hey guys, 

This post is going to have to be quite a quick one because I have so much to do, and so little time to do it in! 

As I mentioned last week, I'm doing the expedition section of my Duke of Edinburgh's award this weekend (hence why this post is going up tonight instead of tomorrow like usual). I thought I'd explain a little more about it and what I have to do!

So, tomorrow morning, I have to get up, grab my bag and head out into the wilderness! I'm joking of course! I just have to go about 30 minutes away from my house and there's a training center where I will be until Sunday morning. As soon as we get there we have to put up our tents and then walk for the day, learning how to navigate and stay on the right path! On Saturday evening we have to cook our dinner on the little portable stove we have and then try to keep warm! Then when we wake up we have to have our breakfast, pack everything down and walk to the pick up point which I think is about 10 miles, but I may be wrong. 

This whole experience is to go towards completing the bronze section of my award. So far, I've completed the physical, skills and volunteering sections (for 6, 3 and 3 months in turn) but the expedition is definitely the thing that excites (and scares) me the most! The other sections required me to complete a certain length of time but for the expedition we have to be split into a group and then, while we're walking we have to research an end goal. Then we have to present it in some way, whether it is in book or presentation form. 

I have to have a lot of kit, including; some of the parts of a tent, a sleeping bag, food enough for both days, waterproof clothing and a few other things that all have to fit inside the 60/65L bag I have (which is massive by the way). It is very heavy but I'm pretty sure I can deal with it, I think it weighs about the same as a small child! I'm really looking forward to it, which is weird because I didn't enjoy when I went camping in the summer! I think it must be because I'm in a group with 5 other girls that I'm good friends with, so I think it's going to be fun.

At first I was a little hesitant about starting my DofE but now I'm so glad I did! Not only does it add to the CV I'll use to try and either get into university or get a job, but it has helped me start, and do, new things! I'd really recommend it to anyone thinking of starting!


Wish me luck!
Until next time - that is, if I make it back! (which I'm sure I will!) ;)
Grace
X